Guide: set up your first online reservation in 10 minutes
From signup to a widget in production taking bookings, step by step. Includes key configuration decisions, common mistakes, and what to leave for later.
Tutorials often lie about time. “Set up X in 10 minutes” rarely accounts for the real time: deciding what to put in each field, understanding the concepts, backtracking when something doesn’t fit.
This guide really is 10 minutes, with two conditions: have your restaurant info handy (capacity, hours, zones) and accept a few “default-for-now” decisions you can revisit later. The goal isn’t perfection — it’s that 10 minutes from now you’re actually taking online reservations.
What you need before you start
Have these on hand:
- Trade name of the restaurant and your email.
- Total capacity (approximate) of the dining room.
- Hours for at least one service (e.g. dinner from 8:00 PM to 11:30 PM, Thursday to Saturday).
- URL or CMS of your website (WordPress, Wix, Squarespace, custom site).
Optional but useful: logo as PNG or SVG.
Five minutes if you have it; otherwise track it down before starting the timer.
Minute 1-2: account and restaurant profile
Create the account in the Reserver dashboard with email and password. No credit card required.
In the first step, the wizard asks for the basics:
- Trade name (shown in customer confirmations).
- Address and phone.
- Time zone (auto-detected, but reviewable).
- Default language for the widget.
Don’t get stuck picking the “definitive name”: you can change it later without affecting anything.
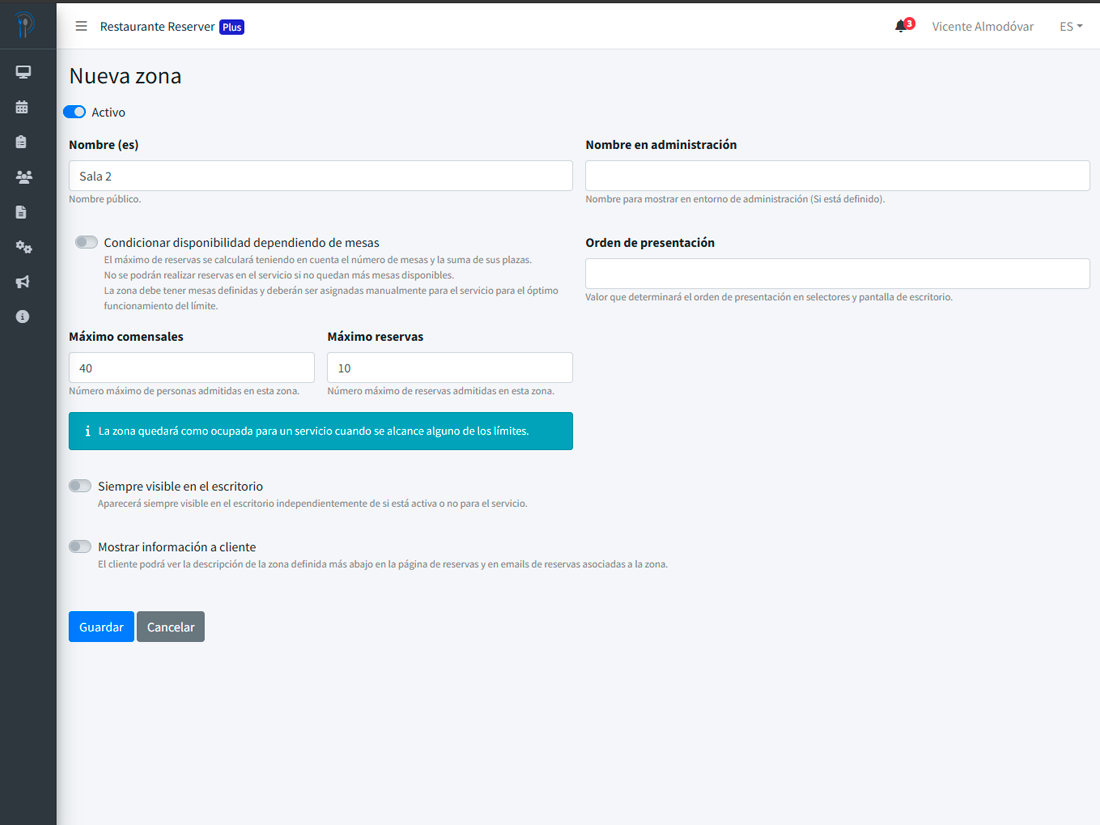
Minute 3: define a zone and its capacity
The most important concept, and the one most people overcomplicate. To get going, create a single zone called “Dining room” with the total capacity of your restaurant. If you have 40 seats, set 40.
Subdivisions (terrace, indoor, private room) come later, once you’re up and running. The widget works perfectly with a single zone for the first few days.
Common mistake: trying to model your exact floor plan from minute one. Ignore individual tables for now — on the Free plan, only the total capacity per zone matters.
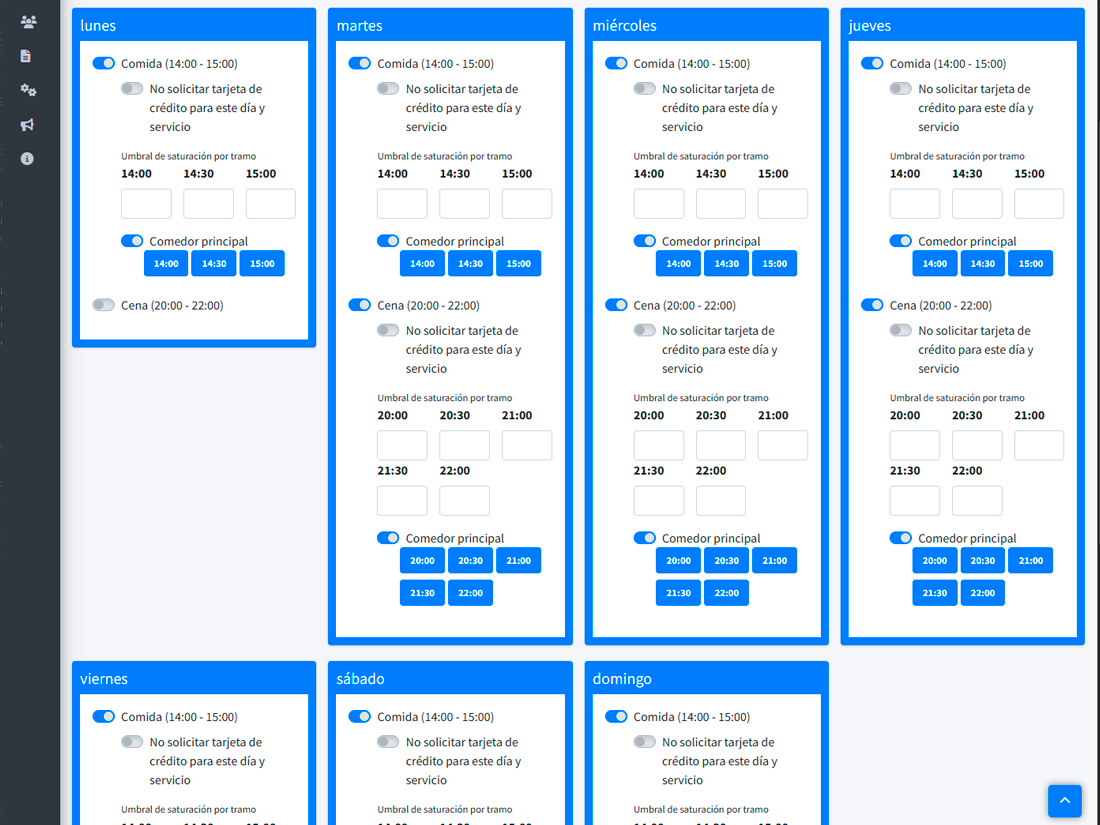
Minute 4-5: set up a service
A “service” is a shift: lunch, dinner, brunch. For this guide we’ll create one:
- Name: “Dinner”.
- Hours: for example, 8:00 PM - 11:00 PM.
- Booking slots: 30 minutes (adjustable).
- Active days: Thursday, Friday, Saturday (or your real ones).
If your restaurant has more shifts, add them at the end. One or two are enough to validate the flow.
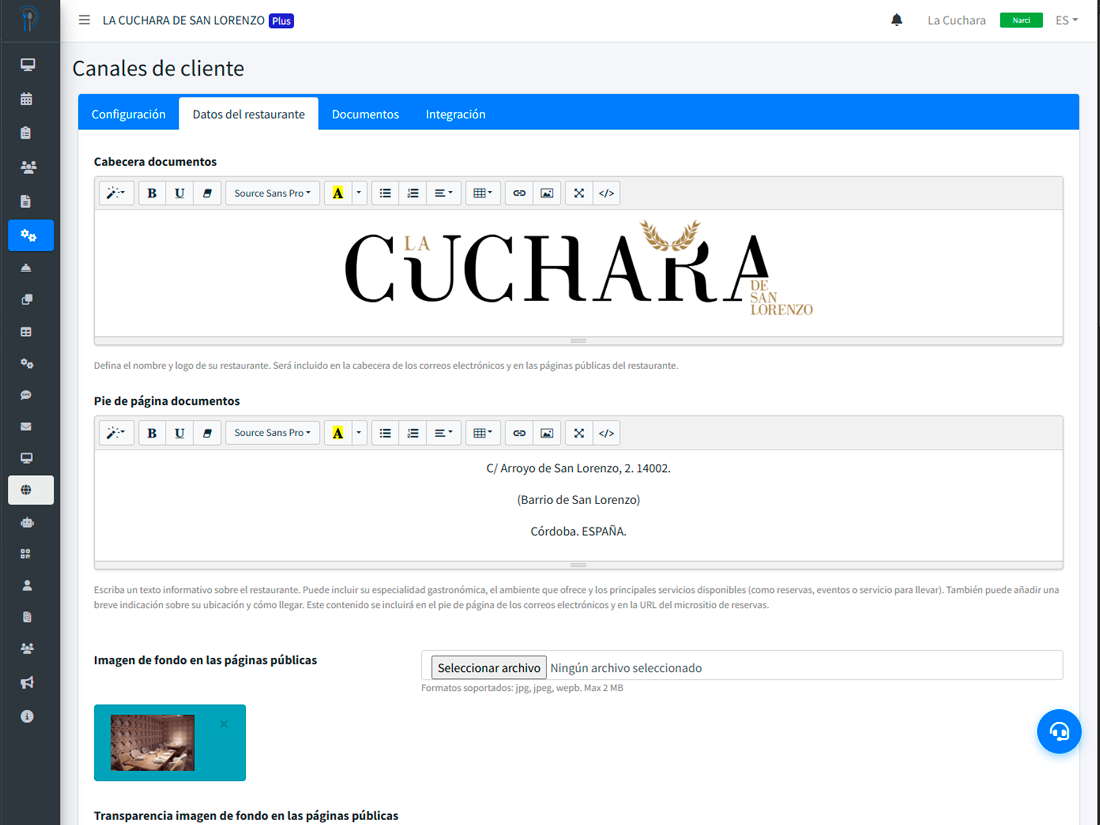
Minute 6: define your cancellation policy and lightly customize the widget
Open “Customer channels”. Three cosmetic tweaks so the widget doesn’t look generic:
- Button color: pick the one closest to your brand.
- Logo: upload your PNG/SVG, if you have one, in the “Document header” section.
- Legal documents: turn on the ones you’ll use. If you’ve filled in your restaurant details, the legal text is rendered automatically with your information.
Don’t enable Stripe pre-authorization yet — that requires connecting your Stripe account and configuring a per-service policy. Leave it for week two.
You can spend an hour another day making it pretty. Right now, what matters are the visitor’s first four minutes.
Minute 8: publish the widget on your site
Copy the script shown in the “Integration” section. Paste it into the HTML of the page where you want the booking button to appear.
Depending on your CMS:
- WordPress: custom HTML block on the home page or in a “Book” section.
- Wix / Squarespace: “Embed code” widget.
- Custom site: your developer drops it in within 2 minutes.
- No control over the website: use the public Reserver URL (format
/reservations/your-restaurant) and add a simple button linking to it.
Publish and open the page in an incognito window. The button should appear and work.
Minute 9: make a test booking
Book yourself through the widget, as if you were a customer. Walk through the whole flow:
- Pick a future date.
- Choose a time inside the configured service.
- Enter a real name, email and phone.
- Confirm.
Receive the confirmation email. Check that it lands in your inbox (if not, check the spam folder — SPF/DKIM DNS records can be set up later).
In the dashboard, you’ll see the reservation with status “Email confirmed”. All good.

Minute 10: turn on reminders
In “Email settings”, make sure these are enabled:
- Booking confirmation email / 24-hour reminder before the reservation.
The bodies for status-change emails come pre-filled — emails will go out when the customer books or cancels. You can personalize them later, but for now what matters is that the 24-hour reminder is active so you start cutting no-shows from day one.
SMS requires topping up a credit pack (from €9). Add those next week, along with Stripe if you plan to charge.

What to leave for later
With this in place, you’re already taking online reservations from your site, in your branding, with no per-booking commission. What you do NOT need to set up today:
- Stripe and pre-authorization: only useful if you have a real no-show problem. Read our specific guide.
- Automatic assignment to individual tables: relevant once you model the floor in detail.
- Marketing campaigns: until you have 30-50 reservations in the CRM, they don’t pay off.
- Reserve with Google: requires an active Google Business Profile and takes 24-72 h to be approved.
- AI assistant: wait until you know the product before configuring responses.
All of that gets added in the second and third week, with room to breathe.
Common mistakes in the first 30 days
Not telling the team
Staff keep taking phone reservations “from memory” and forget to enter them into the system. For the first two weeks, leave a physical reminder: “Every phone reservation goes into Reserver immediately”.
Tweaking the cancellation policy every week
Leave the policy alone for two months before changing it. You need enough data to know what works. The metrics live in “Analytics”.
Forgetting to update the yearly calendar
Easter, local holidays, long weekends. If you don’t block them in the yearly calendar, you’ll take reservations for closed days. Spend 10 minutes in the first month blocking the next 12 months.
Frequently asked questions
Can I have multiple operators using the dashboard?
Yes. On the Free plan, 1 operator. On Pro, up to 5. On Plus, unlimited. Each with their own credentials.
Does it work if I don’t have a website?
Yes. Reserver generates a public URL (reserver.es/reservations/your-restaurant) you can share via WhatsApp, social media or email. Eventually it’s worth embedding it on your own site, but it’s not a requirement.
What about phone reservations?
Your operator enters them manually from the dashboard, in 15 seconds. They feed the CRM the same way widget bookings do.
What if someone books twice?
Reserver detects duplicates by email and phone and warns you. In the CRM, both reservations point to the same customer.
If you take longer than 10 minutes with this guide, write us at info@reserver.es with the screen where you got stuck. We reply in under 2 business hours.